List view
The first of the three views available is List view. This is the best way to see detailed information about your music and other content, because each track or item displays on its own line with a number of columns of information about it. To enter List view, click the leftmost part of the triple View button (located at the top of the iTunes window, to the left of the Search field), or press Command-Option-3. By default, List view displays only a few columns for music: Name, Time, Artist, Album, Genre, Rating, and Play count. (Other columns display for movies, TV shows, audiobooks, or podcasts.)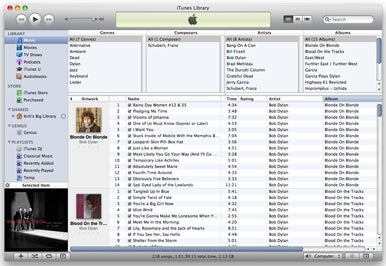
List view
You can sort your music by the information in any of these columns by clicking in the column headers—for example, the Date Added column to see the items you’ve most recently added to your library—and if you click the Album column it toggles between Album, Album By Artist, and Album By Year.
In List view you can also display a browser (View -> Show Column Browser), and can choose to have it show at the top or the side of your list as well as choose which columns it displays. The browser lets you narrow down what iTunes displays. For example, if you want to see only your jazz tracks, click Jazz in the Genres section of the browser; you can then see those artists who are only in that genre, and see all their music by clicking one of their names.
List view is the default view for any playlists you make, but you can choose one of the other two views by clicking the View button, or using one of the View menu items.
Grid view
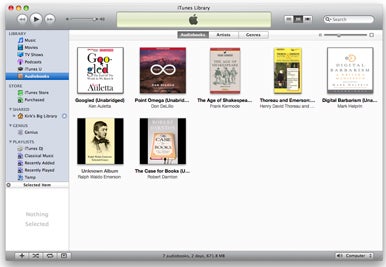
Grid view is the default for the different iTunes libraries: Music, Movies, TV Shows, Podcasts, Audiobooks, and iTunes U. If you’ve never launched iTunes before, or if you’ve never changed views, this is what you’ll see in each of those libraries. Unlike List view, where you see a lot of text, Grid view shows big icons of each item (album, movie, podcast, and so on) on a plain background. (By default, this is a white background, but you can change it to black. Choose iTunes -> Preferences, then, from the Grid View pop-up menu, change Light to Dark.)Grid view is good if you want to see an overview of your content. Each grouping shows as one icon, so if you have a single track from an album and an entire album, each will show as one icon. The same is true for audiobooks, TV shows, and podcasts; if you have one or more chapter/part/episode, each group will have its own icon.
Grid view
You can also display a header by choosing View -> Grid View -> Show Header, which provides a button bar where you can choose sort criteria, and a slider you can use to change the size of the icons.
With Grid view, you can play items easily. Just move your cursor over an icon and click Play content type when that label displays. You can’t stop playback the same way, though; you’ll have to click the Pause button at the top-left of the iTunes window.
When you double-click an item in Grid view, iTunes goes “into” that item, and opens its contents in a List view window. You can explore the tracks that display, or play them, and to return to Grid view, click All Albums, at the top left of the Grid view header.
Cover Flow view
The third view in iTunes is Cover Flow, which you might be familiar with from the Finder or from your iPod or
Cover Flow view
Choosing the right view
Depending on which type of content you’re looking at, you may want to use a different view. For movies and audiobooks, Grid view is great, because items in these libraries usually don’t contain many files. A movie as a Grid view icon is easier to see than in, say, List view, and for audiobooks, each Grid view icon hides the multiple files for a book.For music, depending on the size of your library and the number of albums, any of them can work, but if you’re sorting or searching for music, List view is most practical. Grid view is good if you’re visual; if you like to choose what music to play by looking at album art. Some people like Cover Flow view, because you can “flip through” your music easily, but I find that with a large library it can be unwieldy.
Remember that you can change views whenever you want, and you can apply different views to each part of your iTunes library, and to each individual playlist. So try them all out and see which is best for your needs.
http://www.macworld.com


0 comments:
Post a Comment